How to Send a Postal Mail Event Invitation

Request your Selection from IT
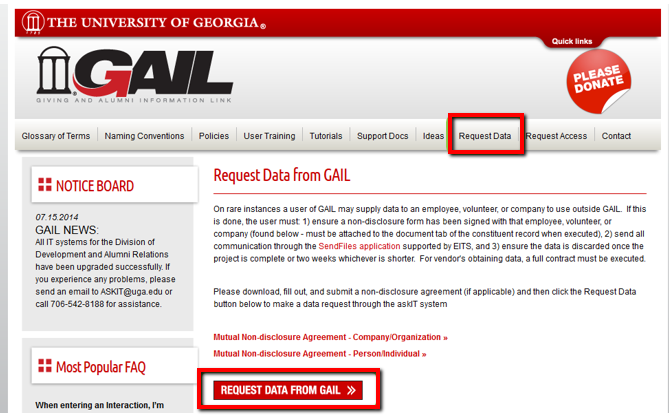
There’s a couple of different ways to make a request with IT. If you’re on the GAIL website (alumni.uga.edu/gail) click the “Request Data” tab and then choose the “Request Data From GAIL” button.
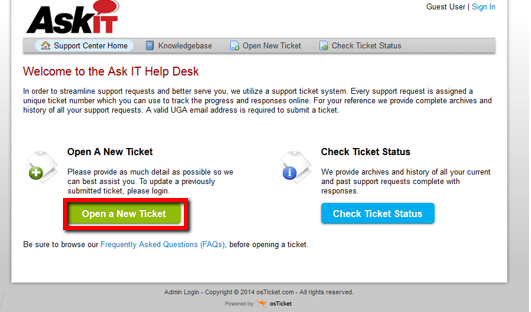
From here, you’ll click “Open a New Ticket” and then fill in the required information.
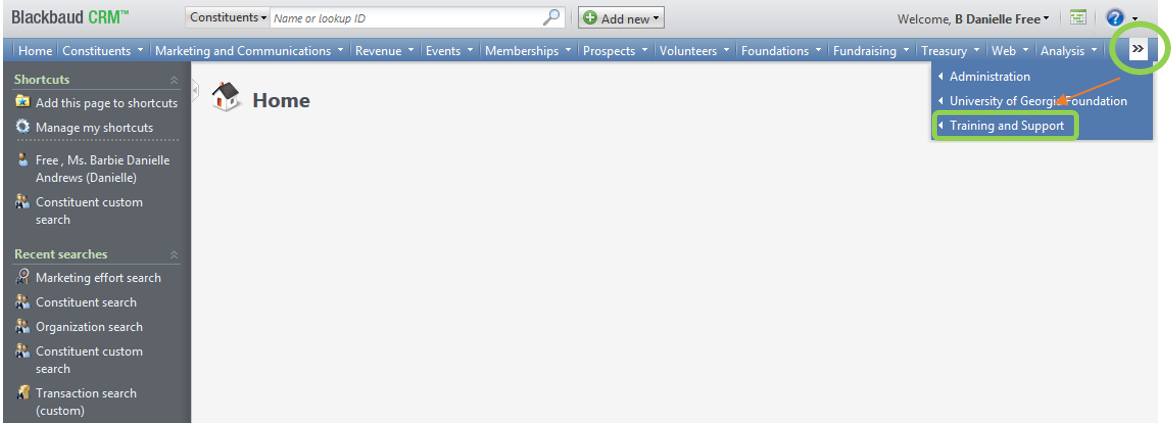
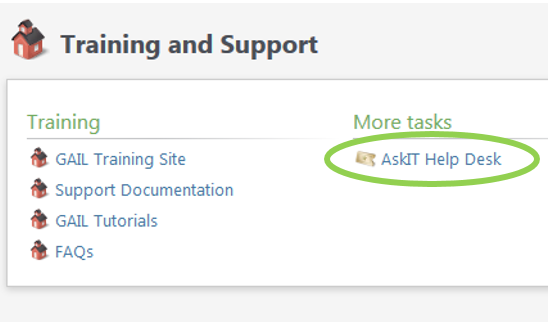
Or, if you’re in GAIL click the two arrows at the end of the functional area bar and choose Training and Support.
**Note: If you do not want Foreign addresses or Companies, be sure to state that in your ASKIT request!**
Click the AskIT link and create a new ticket by filling in the required information.
Create the Package
For event invitations that are being sent via postal mail you can use a generic package as mailed invitations do not require that a specific message be entered into the package. If you choose to use a generic mail package use “Event Mail Package”.
If you want to create your own package so that you can insert a custom export definition follow these instructions:
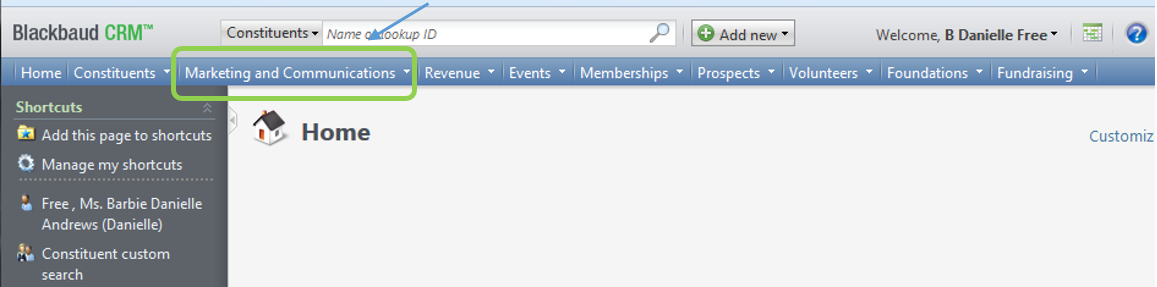
Navigate to the “Marketing and Communications” functional area.
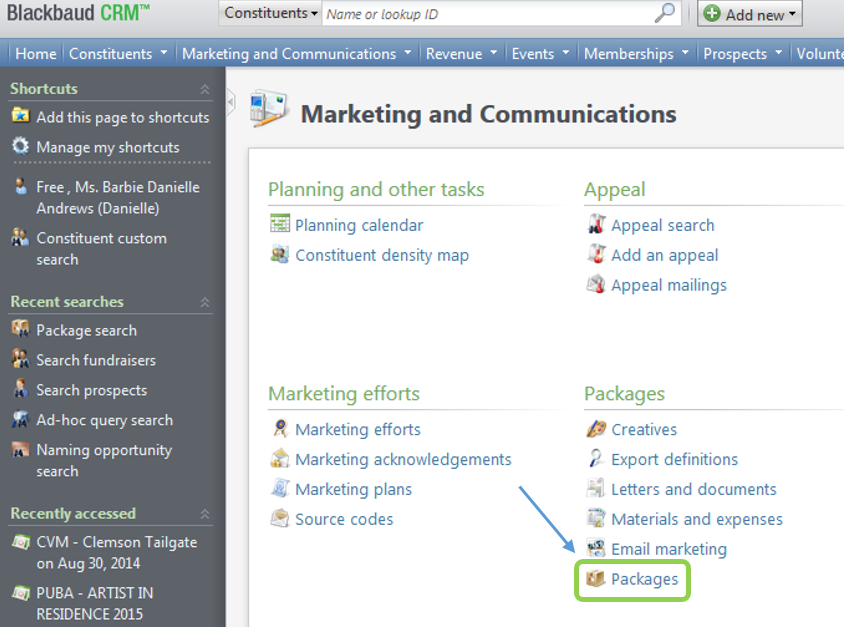
Click on “Packages”.
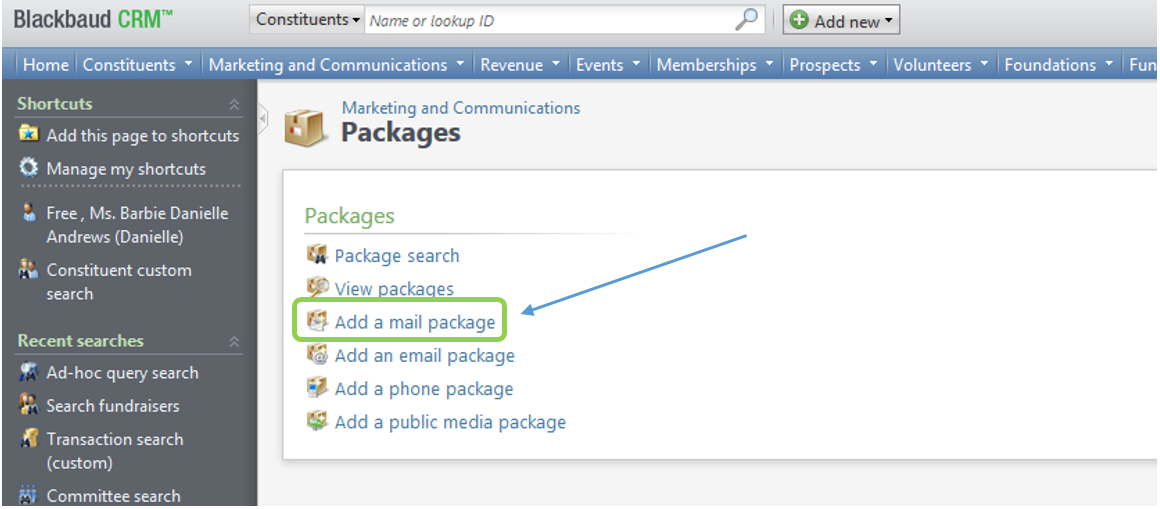
Click on “Add a mail package”.
This screen will appear.
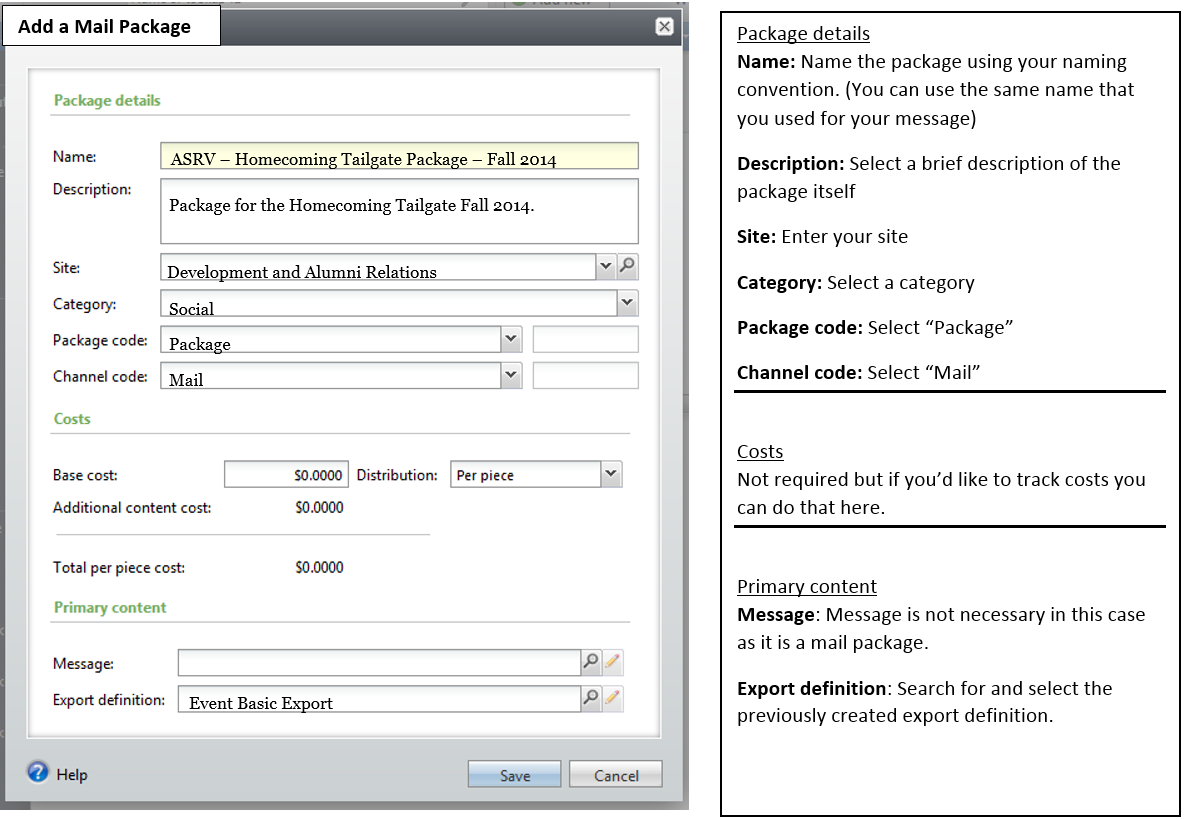
Save the Package.
Create the Event
Navigate to the “Events” functional area. If you haven’t already done so you’ll need to add a new event. If you have, you’ll search for and select the existing event. **If you need additional information on how to create events please sign up for an events class here**
Create the Invitation
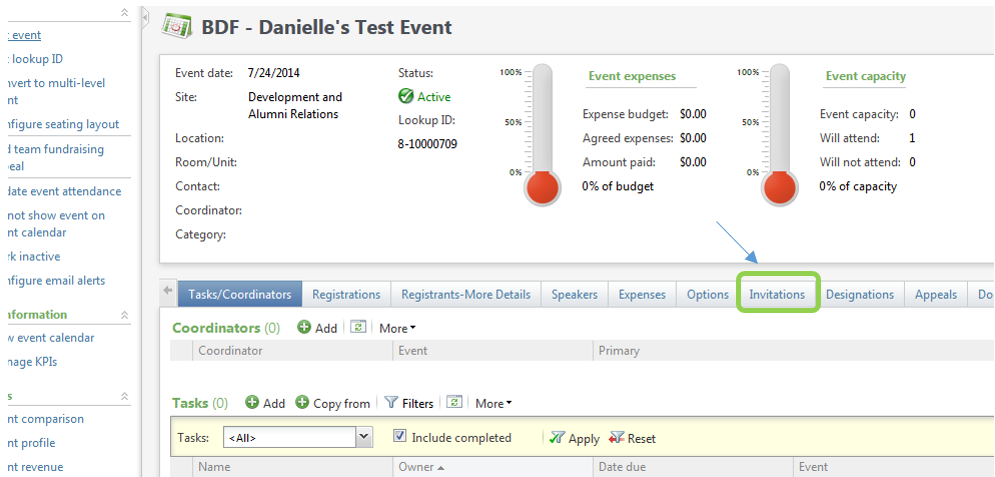
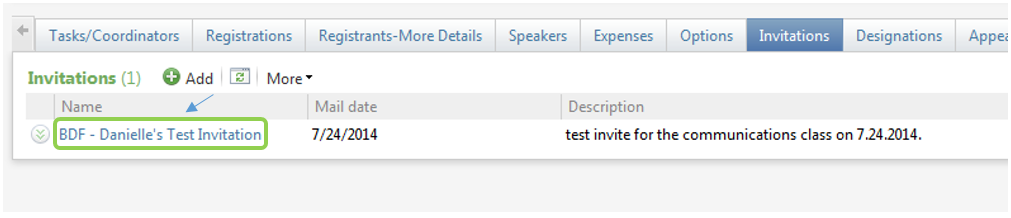
From within the event click on the “Invitations” tab.
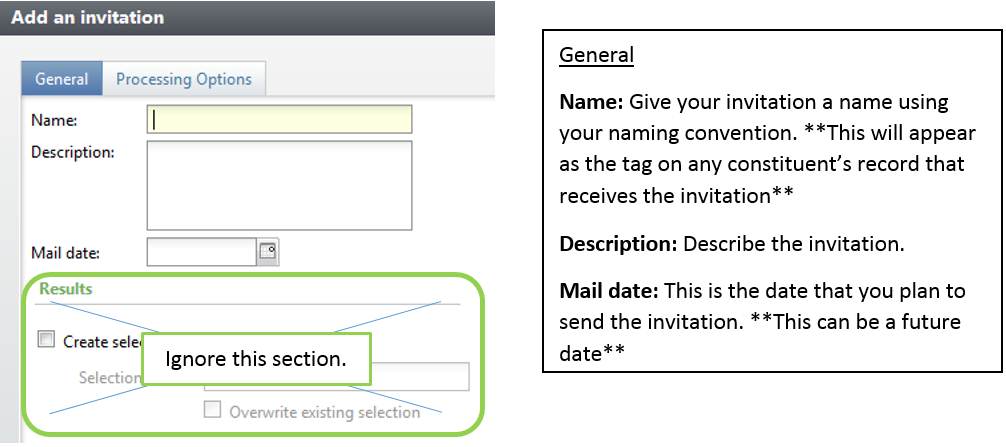
Click “Add” to create a new invitation.

The screen below will appear. Enter the “General” details.
Click on the “Processing Options” tab.
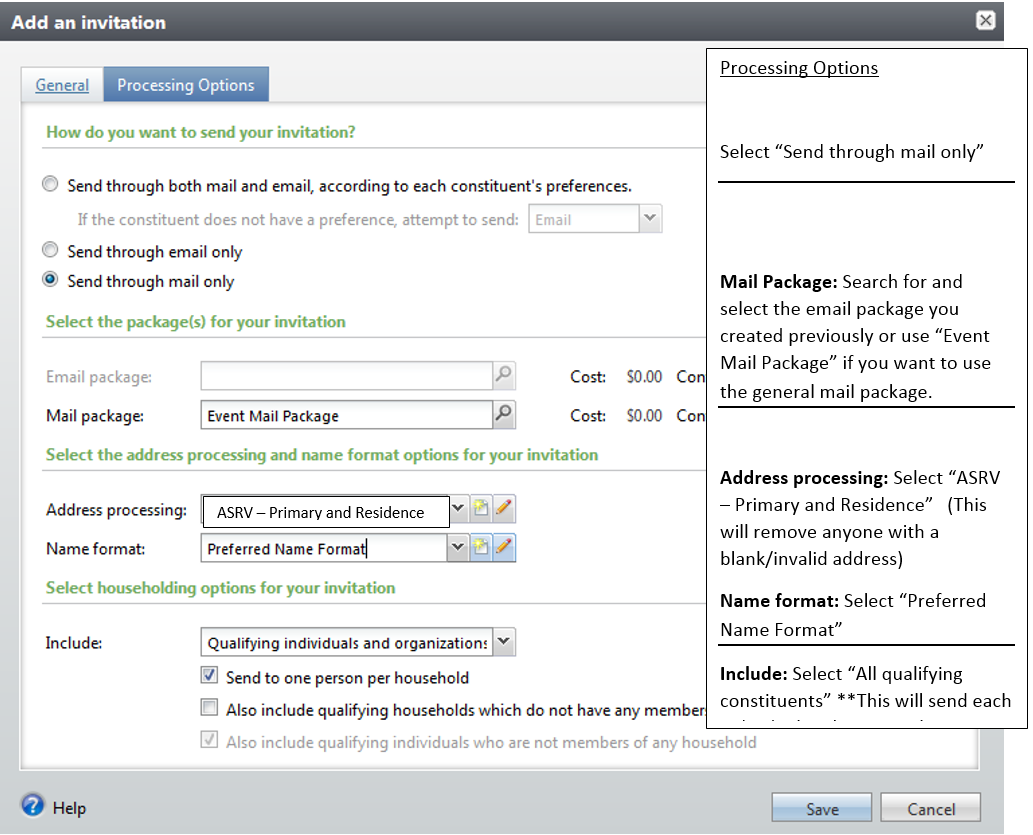
Save the invitation.
Process and Send the Invitation
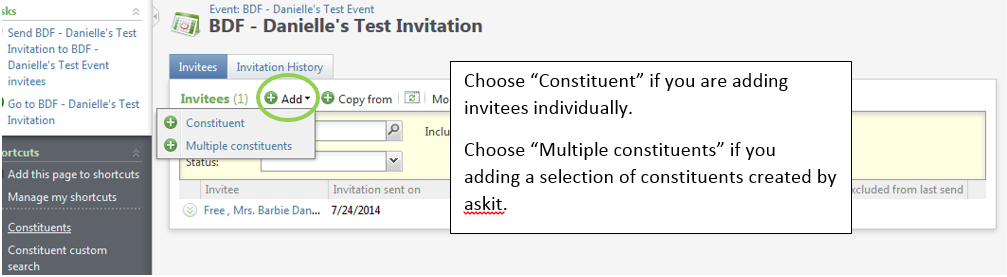
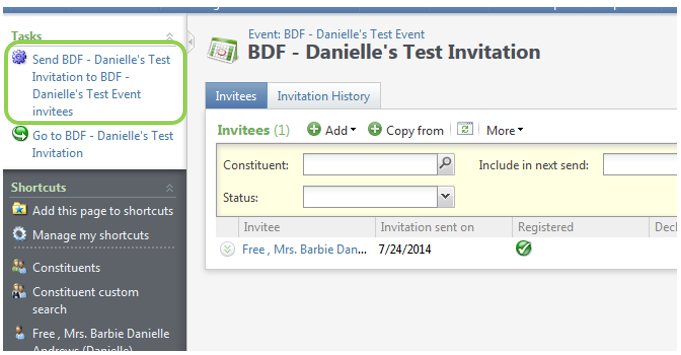
Select and click on the desired invitation name to add invitees.
The screen below will appear. Click “Add” to select your desired constituents.
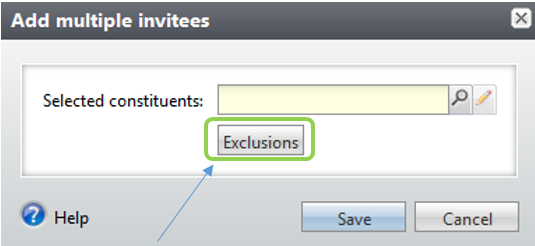
When you select to add “Multiple constituents” the box below will appear. Search for and select the selection that you had askit create for you.
You must also process your own exclusions when you choose to add multiple constituents. Click “Exclusions” and the screen below will appear.
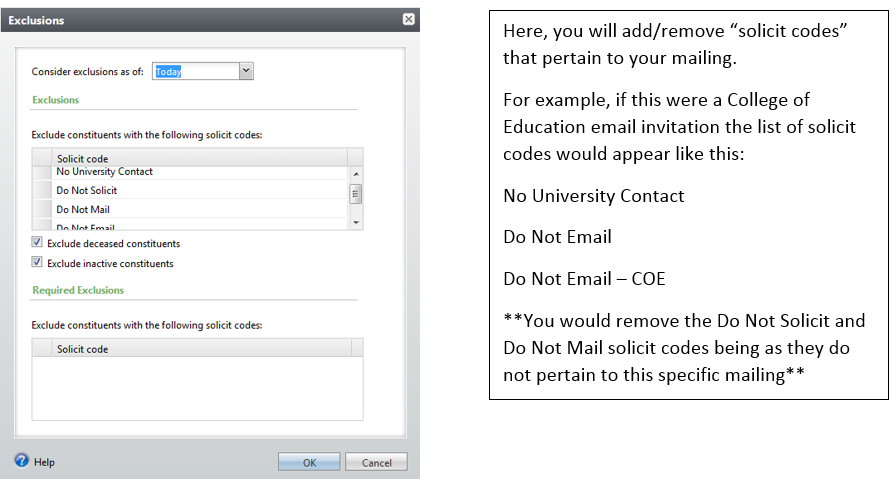
Click ok to save your exclusions.
When you are satisfied that your list of invitees is complete and you are ready to send the invitation “Send” the invitation. Click “start” when the next dialogue box appears. This is not the actual sending of the email, it is the process that tags constituent records.
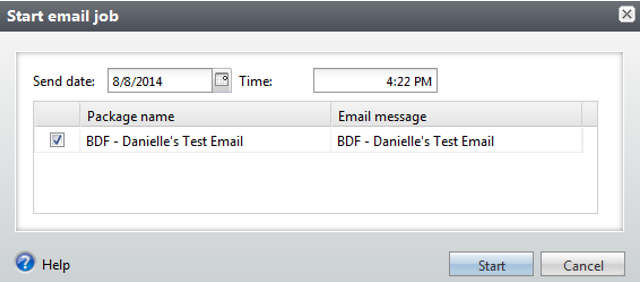
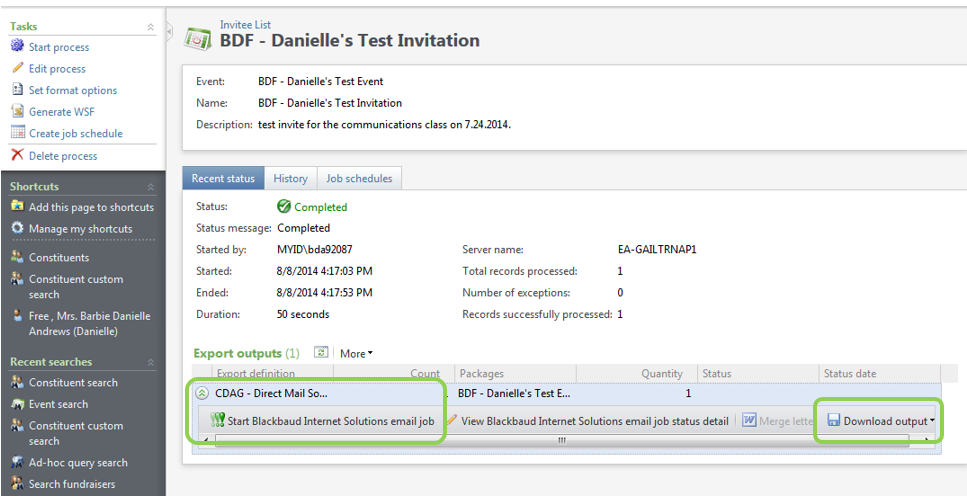
You will be redirected to a status screen. This screen is where you will select to actually SEND the invitation. Click the two green arrows beside the export definition name to expand more options. Click “Start Blackbaud Internet Solution email job” to schedule the send. Click “Download output” to download an Excel file of the invitees.
When the dialog box below appears you will schedule when your email is to be entered into the Blackbaud email queue. *****IMPORTANT: Once you click start you cannot undo this process. Your email will be sent on the date you selected as the send date.*****