So, you have a PDF that you’d like to put on either the Alumni, Give or DAR site(s), but you’re not sure if the aforementioned PDF meets the criteria for digital accessibility as laid out in the Americans with Disabilities Act Title II digital accessibility (“Final Rule”).
Well, fear not! Before you send the PDF to DARCOMM to include on the website (or upload it to the site yourself), take these steps to ensure it is readable and accessible for those with disabilities.
The very first step is to make sure you have Adobe Acrobat downloaded on your computer before beginning. Note: panels and icons may appear in different areas of the program if using an older Acrobat version.
All DAR employees have access to Adobe Acrobat. If you need assistance downloading it to your device, please submit a support ticket with AIT.
Basic Setup Information in Adobe Acrobat
- Open Acrobat and click the See all tools feature
- Search accessibility and open the Prepare for accessibility tool
- Select and open the file you would like to check for accessibility
- On the left-hand side under All tools>Prepare for accessibility, click Check for accessibility, then Start Checking
- The accessibility report will show up on the right-hand side of the screen, and you can start fixing the errors
-
- Red (X) indicates something is wrong and needs to be corrected
- Blue (?) indicates there is a potential error and needs to be corrected manually
- Passed indicates the item is already correct and accessible; you can skip the steps for any categories below that already say passed
Red (X) Items in the Accessibility Checker
- Click the item with the Red (X)
- Click the 3 dots next to the Accessibility Checker title
- Click Fix
-
- The item may be passed and nothing else needs to be done
- A popup box may come up that needs attention. Many are self-explanatory such as confirming the Primary language as English
- If the popup box is more complicated, refer to the below categories
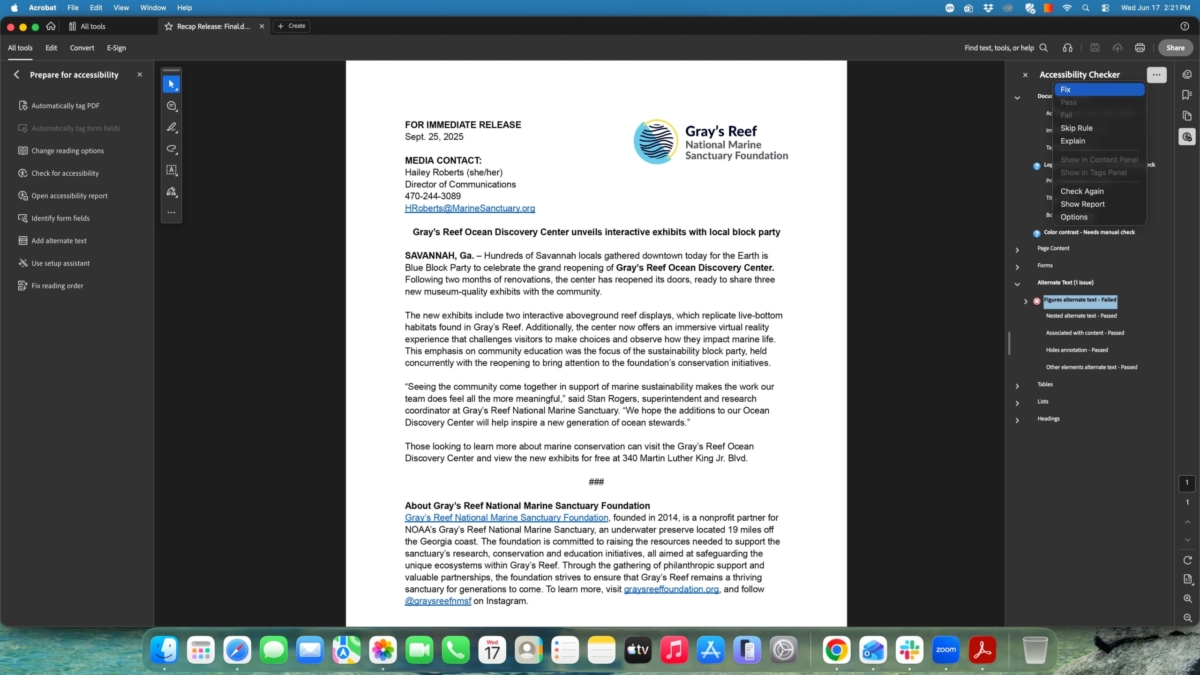
The Fix button is located within the Accessibility Checker on the top right of the screen.
Alternative Text with Red (X)
- After clicking Fix, a box will appear that asks you to describe the image
- Describe the image to the best of your ability (complete for all images in the PDF)
-
- For logos, put [brand name]’s logo. Ex: UGA logo or UGA Development and Alumni Relations logo.
- For images or illustrations, describe them. Ex: An otter floating on its back
- For purely decorative items that do not add anything to the context of the piece, click the box labeled Decorative figure. Ex: A swirl design or a floral element that makes the piece look aesthetic but would be excessive for a person with limited vision to hear described.
- Click Save & Close
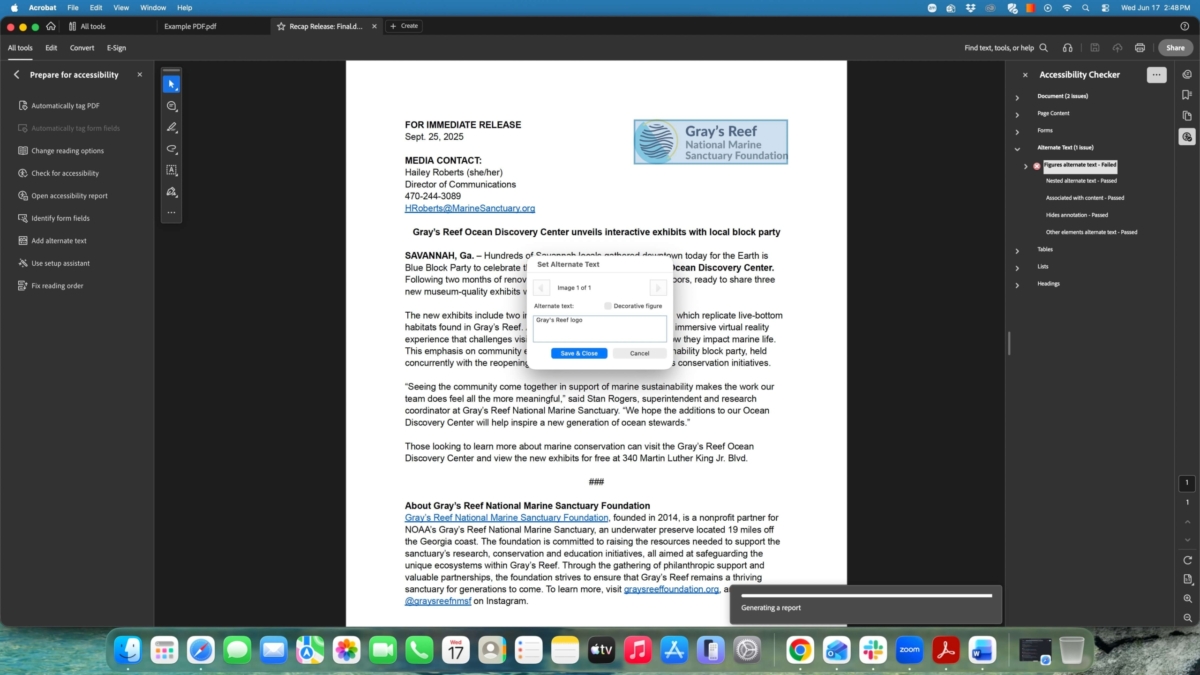
The description of Gray’s Reef logo in the Set Alternate Text box
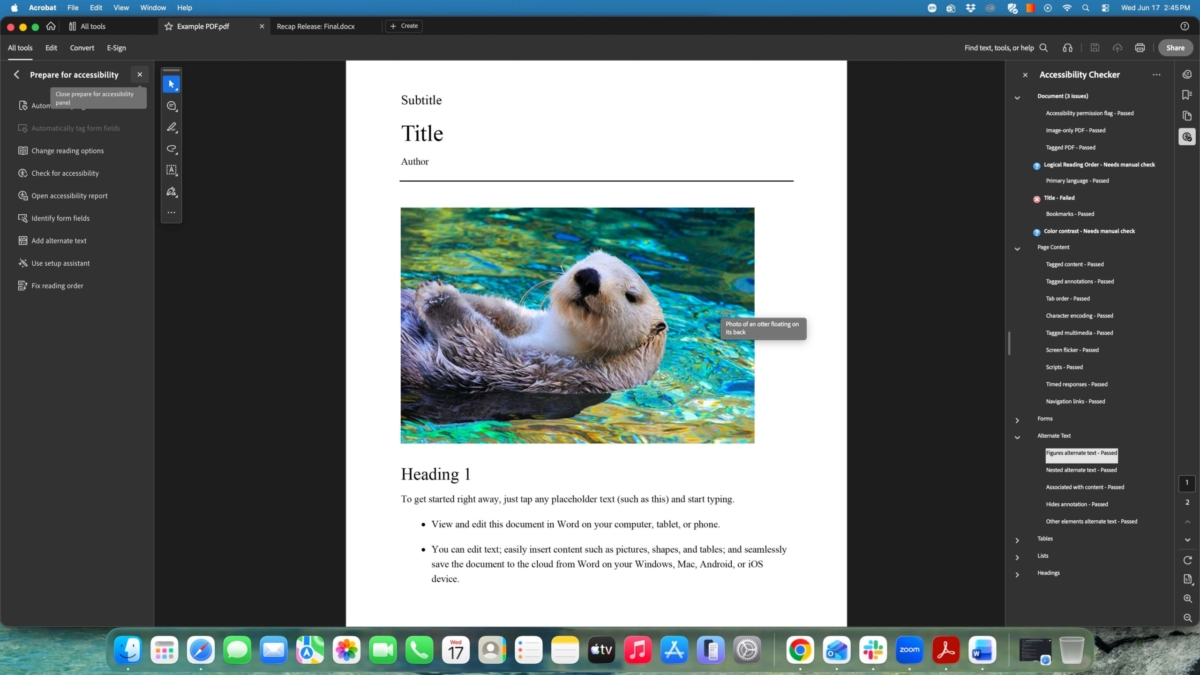
The alternate text for the otter image can be seen by hovering over it.
Title with Red (X)
- After clicking Fix, a box will appear asking for a description of the title
- Type whatever you want to title the document
- Ensure Leave As Is under the title box is unchecked
- Click OK
Color Contrast with Blue (?)
- Go through the PDF and make sure that none of the text is too faint and that the colors of the text are easily read
- If something seems too faint or has hard to detect colors, change the font itself or the font color to something like solid black or navy, so that it is accessible to readers
-
- This is more subjective but ensures people with limited vision or color blindness do not struggle to detect the content of the piece
- There may not be anything to change if everything seems easily detected already
- Once completed, select the 3 dots next to the Accessibility Checker and click Pass
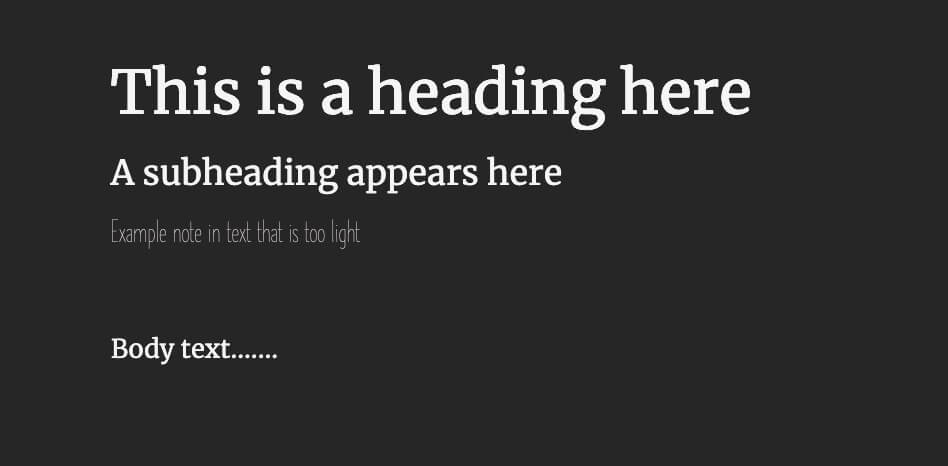
The 1st two lines and the last line of text appear legible but the 3rd line is too faint for some readers to pick up.
Logical Reading Order with Blue (?)
- Click the item labeled Logical Reading Order
- Click Fix reading order in the left-hand panel or click the Z-shape icon in the far-right column
- Click Show Order Panel
- Go through each numbered item and make sure it is the order you want the piece to be read or processed in (do this for all pages of the PDF)
-
- If there is only one item in the list or the PDF is not divided according to headings, text, images, etc. refer to the below category on scanned PDFs
- Click on any item you want to be moved up or down the reading order and drag it to the new place on the list
-
- Mark any images/items that are decorative or do not add to the context of the piece as Background/Artifact in the Reading Order panel
- Mark any numbered items that are blank spaces and do not contain content as Background/Artifact in the Reading Order panel
- Once the order is correct, you can close the Reading Order popup panel, and click the accessible person icon in the far-right column or click Open accessibility report in the left-hand panel
- With Logical Reading Order selected, click the 3 dots next to the Accessibility Checker title and click Pass
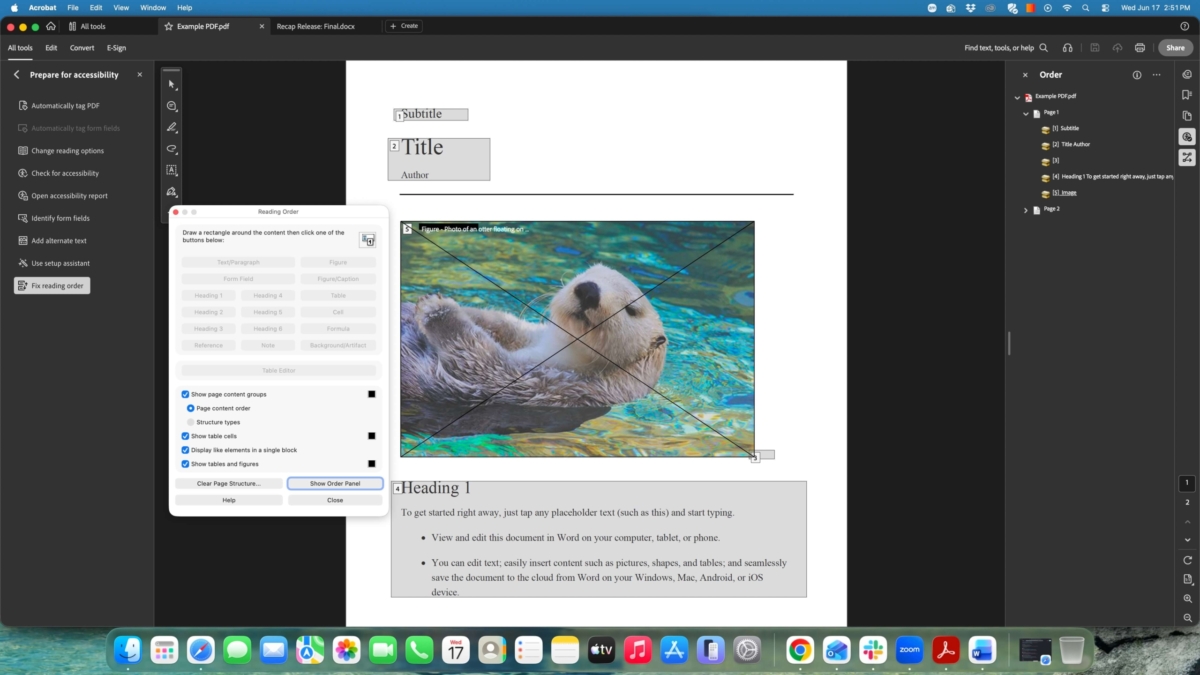
The Show Order Panel button can be found within the bottom right of the Reading Order popup.
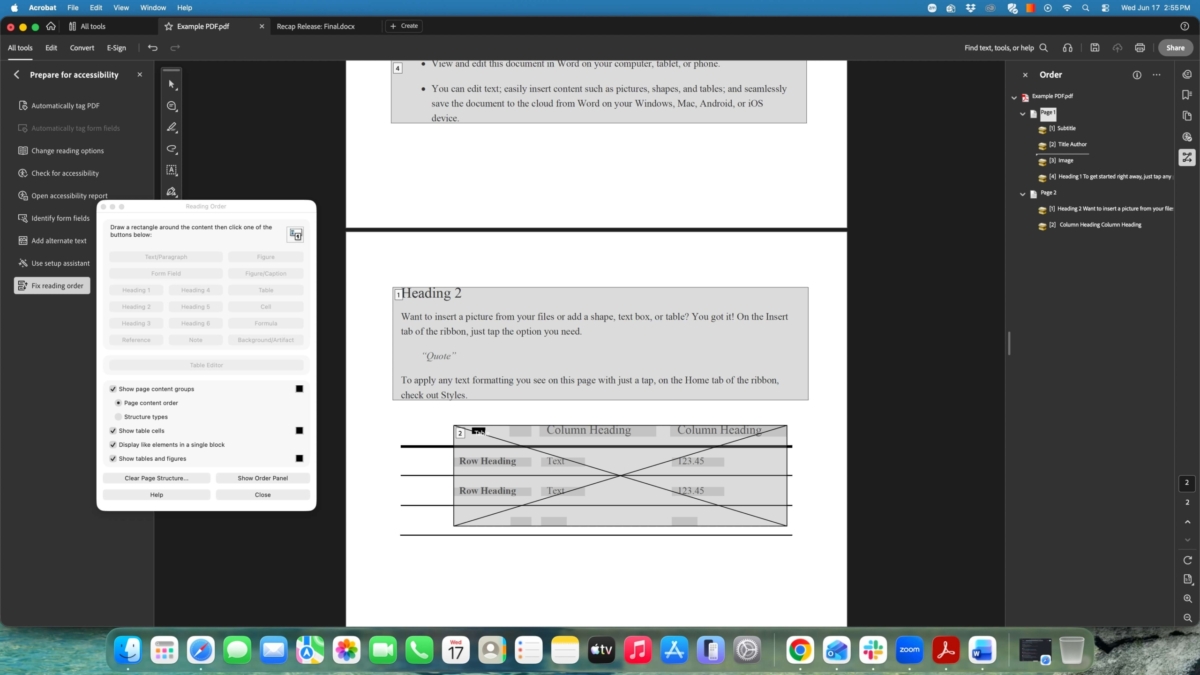
On page two of the example PDF, the numbered items can be found in the right-side panel and be adjusted according to the order they should be read in.
Scanned PDFs or Image–Only PDF
- Click the item labeled Image-only PDF
- Click the 3 dots next to the Accessibility Checker title and click Fix
- In the popup box, change the output to Editable Text and Images
- Click OK
Logical Reading Order for Image Only PDFs
- Ensure the steps in the previous category have first been completed
- Click Fix reading order in the left-hand panel or click the Z-shape icon in the far-right column
- Click the 3 dots next to the Order title
- Click Show page content groups then Structure types
- Manually go through and categorize each element of the piece by holding and dragging the mouse over the individual element on the page
-
- Start with the first heading and after dragging the mouse over it, click Heading 1 in the Reading Order panel
- Continue to go through each element on the page and label it accordingly
-
- Ex: Figure for an Image, Text/Paragraph for body text, Background/artifact for irrelevant additions, and so forth
- After labeling everything, ensure it is in the correct reading order
- Complete steps 6-7 under the Logical Reading Order with Blue (?) category above
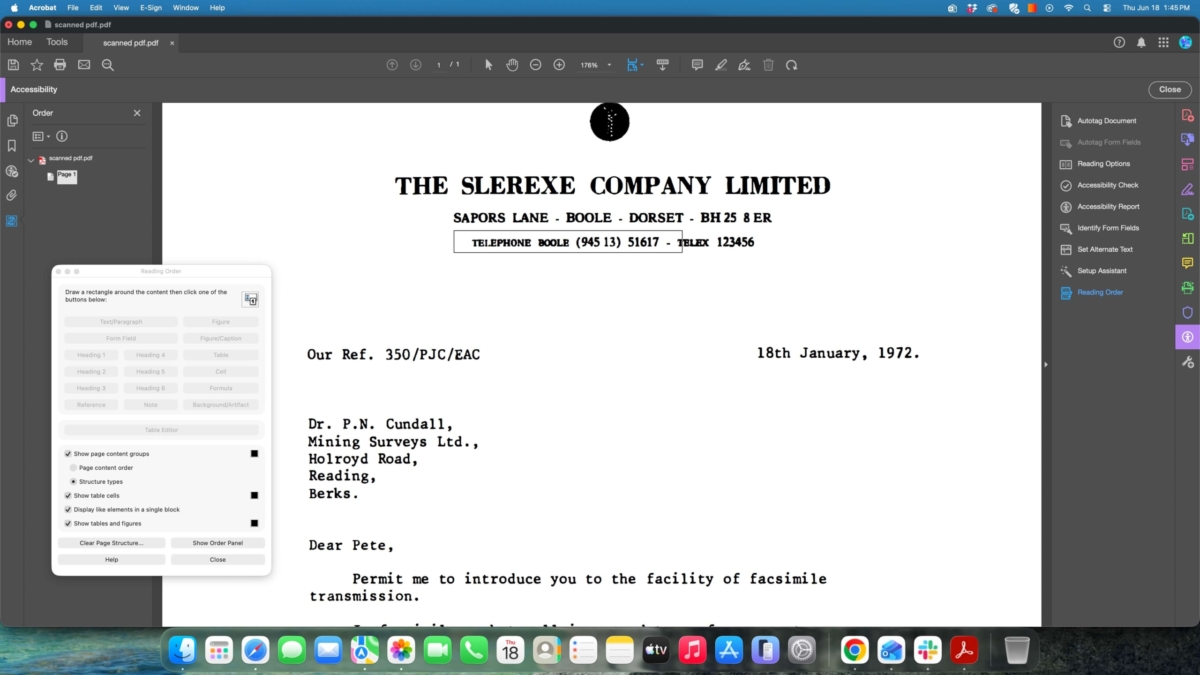
In the example scanned PDF, the cursor is being dragged over the 3rd line of text, so it can be categorized.
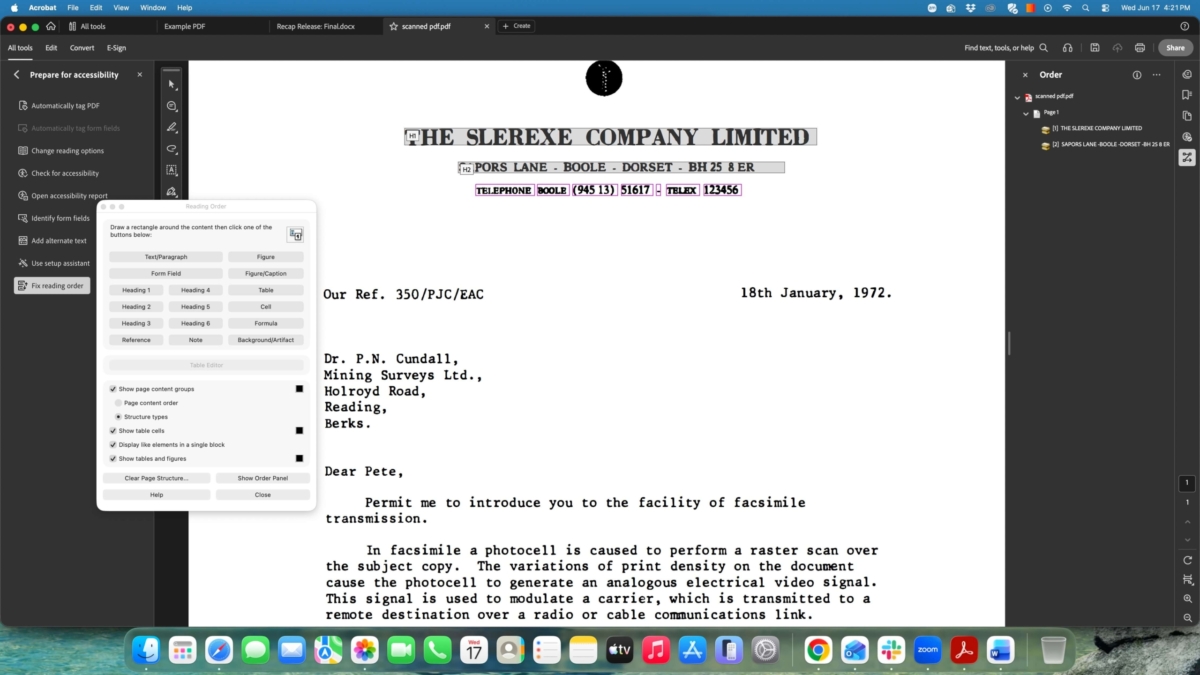
After dragging the cursor over the 3rd line of text, one of the content buttons can now be selected to categorize the text.
Want to learn more about digital accessibility? Check out the Accessibility for Content Creators course in PEP!